If anyone knows me well, they know that I am literally OBSESSED with deals. I am not one of those crazy, coupon-clipping-for-8-hours-a-day types of people, but I do love a good score. It gives me the biggest high that lasts for days. If I HAVE to spend a lot of money on something, I literally get sick to my stomach and want to vomit.
Over the years, I have figured out where to get the best deals on things that I need/love. Here is a list of stores I go to and what I find/try to find there:
*Keep in mind, most of these stores are a "hit or miss" situation. Sometimes they have nothing, sometimes they have gold!
*I also frequent the typical stores, such as: H&M, Forever 21, Target, random mall stores, etc., but I just want to write about the ones that aren't the obvious choice for most.
Cozy: Cozy is located in Provo, across the street from Movies 8/The Plum Tree shopping center. It is right next to Downeast and the old Albertsons. I am kinda apprehensive about telling you all about this store, for it is a little bit of a hidden gem. If you already know of this store, you know of the glory it has within.
This is my "go to" store for blouses, colored jeans, printed leggings, chunky necklaces, studded earrings, belts, etc. They also have plain, long tank tops and t's in every color under the sun for like 7 bucks. They do have dresses and skirts, but I find them to be overpriced. Some of the cutest blouses I have have come from Cozy. It is quite a small store, but it is great.
Burlington: I love the Orem Burlington so much. It isn't ever busy and it is huge. I get so excited walking in, for I know I am going to search and find great stuff.
They have the most random shoes ever. You literally have to search for good shoes. BUT BUT BUT I always find at least one good pair that is so cute, unique, and extremely cheap.
They have amazing blousy shirts, too. I get most of my work clothes from here.
Their baby stuff ROCKS if you didn't already know this. We just bought Parker a 3 piece suit from there for 20 bucks! The little vest is so cute. I love finding baby gifts here, too.
The rest of their stuff is harder to go through, with less success, but it is still worth the look.
Ross: Ross is tricky. You walk in, you see sequined jumpsuits, you think, "What in the...?" I see the same stuff. I, however, also see the potential. It is all about seeing the potential. The first place I go to when I enter Ross is the shoes section. I can almost always find a good pair of flats for around 10 dollars. I like the junior section for clothing. The adult section is where you find the "fashionably-challenged" stuff. I have also found some really cute rugs at Ross as well.
Look quick, if they don't have good stuff, leave. I usually spend no more than 15 minutes in a Ross, unless I find awesome stuff and try a lot on.
TJ Maxx: This store is annoying in a way. They have cute stuff, but I find it harder to find than other stores. They also have a lot of extremely overpriced stuff. Who pays 200 dollars for a purse from TJ Maxx? That's an oxymoron: a 200 dollar TJ Maxx purse haha. The good sections in this store are: Shirts/tops, bottoms, seasonal (some of my cutest holiday decor come from here), baby. I never look at their shoes; they are too expensive. They also don't have anything, really, for men.
There are a lot of stores that I would never think to go in, that I have actually gone into over the last few years, and have found loads of great deals. The trick is to rummage through the CLEARANCE sections. You can get pretty good and pretty fast at doing this. For example, I normally wouldn't think to shop at JC Penney. It is a great store, just not on my typical radar. I, however, have recently gone into Penney's and have looked in the clearance section and have found such cute tops.
D.I: I am not ashamed of it. I adore Deseret Industries. I go there probably 3-4 times a month seeing if anyone brought in a diamond in the rough. You see a hot pink night stand that is missing 5 handles, I see potential.
The things I look for here are: furniture (night stands, desks, filing cabinets, etc.), books, picture frames, wooden decor, dog blankies, etc. The "yard" section is where the larger frames are. I have, occasionally, found great decor in the "wooden decor" section. I get books for my student classroom llibrary from here as well.
Soel: Soel is a really cute little store in the Riverwoods. It reminds me a lot of Anthropologie, my favorite store to walk through. The one misconception that many people have about Soel is that everything is too pricey to buy. I used to think this. However, they do have a Sale section that is great. They also have other items that aren't too expensive for the quality of stuff you get. Check it out!
Home Again: Home Again is a consignment store. They have a few locations. The ones I frequent are near Gardener's Village and in Sugar House. They have THE BEST home decor for really respectable prices. If you are looking for barstools, hutches, tables, decor, etc. this is a place you must stop by.
Urban Renewal: If you are in St. George, you have to stop by Urban Renewal. It is the coolest store with vintage clothing, awesome toys, decor, furniture, etc. It reminds me a little bit of Home Again, but with its own, unique qualities. Check it out!
These are just a few of the places that I like to shop. Again, the main purpose for going to these stores is their prices.
Go check them out!

Friday, February 28, 2014
Sunday, February 2, 2014
Valentine's Day Decor for under 20 dollars!
Valentine's Day has always been one of my favorite holidays. I remember coming home from elementary school, with all my unopened valentines, sitting in my room by myself, and reading each and every one. If a boy I liked gave me one that said something like, "Be Mine" or "You Rock" my heart swooned.
I love decorating for small holiday/months like this, but will NOT pay the expensive prices that most stores charge for current holiday decor.
Here is what I came up with for this year and how I did it:
I bought the burlap pennants, pre-cut and doubled up for thickness, from Hobby Lobby, 2 bucks, plus a 40% off coupon, which made them just over a dollar, for four. I wrote the "XOXO" with a permanent marker. I then hot glued the pennants to some twine.
I bought the berries from Dollar Tree, yes, Dollar Tree. I bought both white and red bunches, cut them and took off the "pretty" leaves, then tied them in bunches with twine. I think I spent like 6 dollars on all the berries. I then placed burlap on the bottom of a basket that I got from Tai Pan for like 6 bucks, and placed the bunches of berries in that.
.JPG)
.JPG)

Entry way: I bought this glass container years ago from Tai Pan. I fill it with different things for different seasons. I have really liked it.
I filled it with Christmas berries that I have used for December decor, then used Christmas ribbon for the top.
My favorite thing to do is, find colors in decor that you can use for multiple holidays/months. Red is key! You can use it for MULTIPLE holidays. I also always hit the "after holiday" sales, too. I recently went to Tai Pan and got a bunch of red Christmas stuff that was 75% off!
The sprigs on the table are also Christmas things.
I bought the red sign from Tai Pan. It was in the damaged section, for some reason and was only a dollar. The red bird I have had for years, but I think I got it at Tai Pan as well haha.
The "LOVE" sign is burlap. I got it from Hobby Lobby. It was just plain but already painted white, for 4 dollars. I then decided to write LOVE on it with permanent marker.
.JPG)
.JPG)
.JPG)
I hung this wreath on our closet door in our living room. I got it from Tai Pan, in their Christmas sale section, for 2 dollars!

I got this wooden heart hanging thing for my front porch from D.I. I think it was like 3 dollars. I go there so often to find things like this. It was just in the wooden decor section. You have to rummage through the UGLIEST things, but you sometimes score cute stuff like this. I feel so unbelievably accomplished when I find cute stuff from thrift stores. It gives me a natural high that lasts for days.
.JPG)
This sign is next to our tv. I thought it was cute. I got it from, again, Tai Pan.
.JPG)
For all of this stuff, I probably spent under 20 dollars, easily. That's like the price of one thing from Rod Works or Gatehouse or something. Definitely worth it!
I love decorating for small holiday/months like this, but will NOT pay the expensive prices that most stores charge for current holiday decor.
Here is what I came up with for this year and how I did it:
I bought the berries from Dollar Tree, yes, Dollar Tree. I bought both white and red bunches, cut them and took off the "pretty" leaves, then tied them in bunches with twine. I think I spent like 6 dollars on all the berries. I then placed burlap on the bottom of a basket that I got from Tai Pan for like 6 bucks, and placed the bunches of berries in that.
The lighting in this above picture sucks. Here is what the berries really look like:
Entry way: I bought this glass container years ago from Tai Pan. I fill it with different things for different seasons. I have really liked it.
I filled it with Christmas berries that I have used for December decor, then used Christmas ribbon for the top.
My favorite thing to do is, find colors in decor that you can use for multiple holidays/months. Red is key! You can use it for MULTIPLE holidays. I also always hit the "after holiday" sales, too. I recently went to Tai Pan and got a bunch of red Christmas stuff that was 75% off!
The sprigs on the table are also Christmas things.
I bought the red sign from Tai Pan. It was in the damaged section, for some reason and was only a dollar. The red bird I have had for years, but I think I got it at Tai Pan as well haha.
The "LOVE" sign is burlap. I got it from Hobby Lobby. It was just plain but already painted white, for 4 dollars. I then decided to write LOVE on it with permanent marker.
I got this wooden heart hanging thing for my front porch from D.I. I think it was like 3 dollars. I go there so often to find things like this. It was just in the wooden decor section. You have to rummage through the UGLIEST things, but you sometimes score cute stuff like this. I feel so unbelievably accomplished when I find cute stuff from thrift stores. It gives me a natural high that lasts for days.
This sign is next to our tv. I thought it was cute. I got it from, again, Tai Pan.
For all of this stuff, I probably spent under 20 dollars, easily. That's like the price of one thing from Rod Works or Gatehouse or something. Definitely worth it!
Wednesday, January 22, 2014
DIY Earring Holder
I will not pay a lot of money for things that I can make, and make cuter and more to my taste.
I decided to make an earring holder so I stopped losing earrings.
Go to D.I. Buy a window screen. Buy a frame. Paint frame using craft paint. Cut screen to size of frame. Hot glue screen to frame on back. VOILA! Cheap and easy earring holder. All for about 5 bucks!
Can you tell I like studs? Haha I do! Now if I could just find all my earrings, things would work out great! ;)
My very favorite home-cooked meal: Corn Flake Rolls
Let me preface this post by saying that you are going to kiss the ground I walk on once you try these bad boys. They are delish!!! I always BEGGED my mom to make them. She would usually only do it about once-ish a year, if that, because they take a bit of time and they aren't the healthiest; but when she would make them, my heart would sing! I am talking, people, about Corn Flake Rolls. I believe there are quite a few similar recipes out there like these, but I have never had ones that are quite as good as these.

Ingredients:
4-5 chicken breasts
1 8oz package cream cheese, softened
2 cubes butter (EEK! So worth it)
4-5 cups-ish corn flakes
2 crescent roll packages (with 8 in each)
2-3 cans chicken gravy
Directions:
Boil the chicken. Shred
Taking the cream cheese and 1 cube of butter, and mix them. It works best when they are both room temperature. If they aren't, just put them in the microwave for under a minute-ish.
Add the chicken to this mixture. Mix well.
Get a large plate, place the corn flakes on it, and crush them.
Taking the second cube of butter, place in small bowl and completely melt it in the microwave.
Open crescent rolls and separate them. Fill each one up with chicken mixture. Don't overfill. Fold them up and make a ball. I find that if you completely seal the inside, it doesn't cook as well. Dip the ball in the melted butter, then roll in the corn flakes and completely cover. Do this 15 more times ;)
Place on an ungreased cookie sheet (you will probably need 2)
Bake at 350 degrees for about 30 minutes, or until the top is golden brown.
Ladle gravy on top.
Serve with corn and shallots!
DIY Nail Detail!
I have always loved painting my nails, especially creating designs. I remember, during my birthday parties in elementary school, having my mom paint our nails with toothpicks and craft paint. She would paint watermelons on our toes and sunflowers on our fingers.
Since then, I have spent hours and hours with toothpicks and those dinky, fine-tipped nail polishes trying to make a cute design. They took forever and they still looked like crap.
Well, one day, I was looking at craft paint at Walmart and I came across these paint markers. A light bulb went on in my head and I bought a bunch. They have small-tipped ones, medium, etc., and they rock! Since then, I have painted my nails many times, creating designs with these things. They dry really fast, you put a clear coat on top, and you are done. My left hand is always a little worse than my right (I'm a lefty) but it is a million times better!
Go buy them! They are like a buck!
.JPG)
My guilty pleasure: Savory Chex Mix
Growing up, my favorite thing my mom would make around the holidays was Chex mix. My mom, however, didn't make the typical, gooey kind. She made the immaculate, savory kind. Still to this day, it is one of my very favorite things to make when I need a treat.
.JPG)
What you will need:
1 1/2 c butter
2 T Worcestershire sauce
2 t onion salt
1 T celery salt
13 cups cereal (you choose)
4 cups pretzels
.JPG)
Melt the first 4 ingredients in a saucepan. Once boiling, pour over cereal/pretzel mixture. Stir.
Bake at 200 degrees for 1.5 hours, stirring every 15 minutes.
*I like 5 cups Rice Chex, 5 cups Corn Chex, and 3 cups Cheerios
*I like to buy those big, disposable turkey pans from the store. You can cook it all in one pan and it is the easiest cleanup!
So easy, so good, especially if you have a salty tooth like me!
What you will need:
1 1/2 c butter
2 T Worcestershire sauce
2 t onion salt
1 T celery salt
13 cups cereal (you choose)
4 cups pretzels
.JPG&container=blogger&gadget=a&rewriteMime=image%2F*)
Melt the first 4 ingredients in a saucepan. Once boiling, pour over cereal/pretzel mixture. Stir.
Bake at 200 degrees for 1.5 hours, stirring every 15 minutes.
*I like 5 cups Rice Chex, 5 cups Corn Chex, and 3 cups Cheerios
*I like to buy those big, disposable turkey pans from the store. You can cook it all in one pan and it is the easiest cleanup!
So easy, so good, especially if you have a salty tooth like me!
Revamp your dressers with cute new knobs!
Bryce and I bought a generic white dresser from Walmart when we got married with some gift cards. It's not bad, but it isn't my total style. So, while at Hobby Lobby, my favorite store, I happened to walk down a massive "knob and handle" aisle. People, they have so many knobs, you wouldn't believe it! Here is a small glimpse of the aisle.

So...I bought some brassy knobs from this beloved aisle. The dresser went from this:
.JPG)
to this:
.JPG)
I wanted to buy a few different ones, for a fun look.
Here are the knobs up closer:


The best part was that each knob was only 2 dollars!!! WAY cheaper than RodWorks or Anthropology, where I usually see knobs. Fun and easy transformation for our bedroom :)
Monday, January 20, 2014
DIY Winter Painting: Deer
I love the D.I. So many great finds for recreation! They have so many massive frames that are so cheap! I bought this one for 12 bucks. It had an ugly painting in it. I flipped the painting over to find a blank canvas on the back. So, I painted it white. Then, using dark brown craft paint, I painted a deer. Like I said with the tree drawing, deer don't have to have perfection. I prefer it to be imperfect.
First, stencil it out. Use a picture reference from online. There are a million pics. Then paint! After it was done, I wanted the antlers to look different than the body. So, using my dollar paint markers that I use for my nails (Walmart, baby), I drew some lines throughout it, smeared them here and there, and made them look like "wood."
Super easy! It is probably 3 feet by 4 feet, so it is really big, which I like.
.jpg)
First, stencil it out. Use a picture reference from online. There are a million pics. Then paint! After it was done, I wanted the antlers to look different than the body. So, using my dollar paint markers that I use for my nails (Walmart, baby), I drew some lines throughout it, smeared them here and there, and made them look like "wood."
Super easy! It is probably 3 feet by 4 feet, so it is really big, which I like.
EASY EASY EASY Cauliflower soup!
My mom always made this growing up. It was one of my faves. It is so good!

Ingredients:
5 cups water
7 tsp chicken bouillon
2 medium cauliflower heads
1 large, yellow onion
1 package sliced mushrooms
1 pint 1/2 and 1/2
1/2 cube butter
1/2 a large Velveeta package
2 t Worcestershire sauce
2 t liquid smoke
1/2 t nutmeg
1/2 t white pepper.
Directions:
Cut up cauliflower and onions. Boil the first five ingredients until soft. Add remaining ingredients. Cook together until Velveeta and butter are melted.
That's it! So easy and so good! Serve with a fun kind of bread or biscuit!
DIY Wooden Tree Painting
I love white in houses. I am always drawn to the white, country decor in magazines. When a Country Living magazine comes in the mail that is an "all white" issue, I get giddy.
Well, I have wanted to find something white and unique that I could put in my kitchen. For years, I have searched for things. What I found was either extremely overpriced or just not my style. I am a unique, frugal girl. I will NEVER pay full price for things. I also rarely like things that can be found in stores for wall decor. That's when I decided to try to make something on my own that was what I wanted, exactly. This is what I ended up making:
.jpg)
We had a bunch of leftover boards in our garage from building our fence. They were very rough, which I like, and seemed perfect. So, I asked my awesome husband to cut these boards and screw them together to make a canvas for me.
This is the back of it:

We also strung some wire on the back.
Next, I went and bought some generic white interior paint from Walmart. I think I paid like 15 bucks for an entire gallon (and I still have over half left for future projects). I also bought some basic paint brushes (some extremely small), and some black craft paint, yes, CRAFT PAINT. Note: be sure not to get foam brushes if you are using rough wood. They don't work, they snag, and suck.
Then, I went to work. I painted the front with about 5 coats of the white paint. If you get a softer, smoother wood, you would have less coats to do, but, again, I like the rougher, rustic look.
After it was completely covered with a good coat of white paint, I stenciled out my tree. I chose to draw a tree because they are imperfect. I hate giving myself restrictions with drawing. Straight lines suck, so I like to choose things that can be imperfect, just like my drawing. Be sure to stencil with pencil and to measure where the middle is so it is centered.
Once stenciled, start painting! I used black craft paint and, first, outlined the trunk, leaves, etc. Then I filled it in. Once the tree was completely painted, I went back with the white paint and painted over any leftover pencil marks, which there were, because I changed my mind over and over.
My finished product turned out perfect! It is exactly what I wanted. I spent under 20 dollars for all the supplies and it is cuter than anything I could find in stores.
You could choose whatever to paint. I almost did a silhouette of an animal, but decided that is too hard. Choose what matches your house. I love trees. To me, they represent life, family, and love. Great choice for our house.
Well, I have wanted to find something white and unique that I could put in my kitchen. For years, I have searched for things. What I found was either extremely overpriced or just not my style. I am a unique, frugal girl. I will NEVER pay full price for things. I also rarely like things that can be found in stores for wall decor. That's when I decided to try to make something on my own that was what I wanted, exactly. This is what I ended up making:
We had a bunch of leftover boards in our garage from building our fence. They were very rough, which I like, and seemed perfect. So, I asked my awesome husband to cut these boards and screw them together to make a canvas for me.
This is the back of it:
We also strung some wire on the back.
Next, I went and bought some generic white interior paint from Walmart. I think I paid like 15 bucks for an entire gallon (and I still have over half left for future projects). I also bought some basic paint brushes (some extremely small), and some black craft paint, yes, CRAFT PAINT. Note: be sure not to get foam brushes if you are using rough wood. They don't work, they snag, and suck.
Then, I went to work. I painted the front with about 5 coats of the white paint. If you get a softer, smoother wood, you would have less coats to do, but, again, I like the rougher, rustic look.
After it was completely covered with a good coat of white paint, I stenciled out my tree. I chose to draw a tree because they are imperfect. I hate giving myself restrictions with drawing. Straight lines suck, so I like to choose things that can be imperfect, just like my drawing. Be sure to stencil with pencil and to measure where the middle is so it is centered.
Once stenciled, start painting! I used black craft paint and, first, outlined the trunk, leaves, etc. Then I filled it in. Once the tree was completely painted, I went back with the white paint and painted over any leftover pencil marks, which there were, because I changed my mind over and over.
My finished product turned out perfect! It is exactly what I wanted. I spent under 20 dollars for all the supplies and it is cuter than anything I could find in stores.
You could choose whatever to paint. I almost did a silhouette of an animal, but decided that is too hard. Choose what matches your house. I love trees. To me, they represent life, family, and love. Great choice for our house.
DIY Mantle Shelf
So...I have wanted a mantle for a long time. Who doesn't want one? Well, we didn't want to put a fireplace in our house (lots of work!) so I decided to make one myself. I looked online and found an awesome blog called "Today's Fabulous Finds." It was super easy and I love the look. Here is my makeshift "mantle" below:


Don't worry too much about unsightly gaps (the consequence of using an old miter box), some caulk will take care of it.
Edited to add: Sarah's tutorial is no longer available, so I'm adding some steps to the post.
After I stained it, I used a foam brush and primed it first. I usually don't prime first when I'm distressing, but the color was so dark that I was worried it would take too many coats of paint to cover it up. I've done it with and without primer, so really either way will work. Just keep adding coats of paint until the brown isn't showing through. I sanded the shelf with sandpaper to distress it when the paint was dry to the touch, but wasn't completely hardened yet. It seems to 'peel' off better and leave more of the stain underneath, when you distress it, if the paint still has a bit of a rubbery feel to it. You can fold your sandpaper in half and use the straight edge to get the straighter distressed lines. Next comes the glaze (optional). I put some dark glaze on a rag and wiped it over the corners and edges and into the inside corners to make them darker. You can also wipe on a light coat of glaze over the rest of the shelf. The last thing I did was to spray it with a clear acrylic spray in the matte finish. I think that it richens the colors and makes the shelf look finished.
Edited to add: I received an e-mail with questions on the construction and supplies, this is my reply. I apologize that this post is so disorganized! At this point I might need to rewrite it. :)
I used wood glue and screws to put the shelf together. It's been awhile since I made my mantel shelf, but I'm pretty sure that I pre-drilled the holes before I screwed the wood together. If you use a drill bit smaller than the size of the screw to drill a pilot hole first it prevents the wood from splitting.
The top and bottom of the shelf are cut from a 1x8x8 and are each 4' long. The front of the shelf is a 1x6x6 board and was cut down to 4' long. The rest of the 1x6x6 was used for the sides of the shelf. When I had the boards cut at Lowe's, I had them cut the 6" wide board down to 4' long for the front, then set the top of the shelf on it (lining up the corners) and then set the remainder of the board in place on the side to measure and mark it for the cut. (The shelf looks taller because the trim hangs down longer than the bottom of the shelf.)
Supplies you will need:
wood (1x8x8 and 1x6x6) I hope I'm remembering this right!
wood glue
screws (I just used some that I had on hand, if you ask at the home improvement store, they can direct you to some that will work.)
sandpaper (medium and heavy grit)
electric sander to sand the rough edges of the boards before and after you put it together (could sand by hand)
paint brush
stain
finish nails (to nail on the trim molding)
wood filler (to fill the holes from the nails and screws)
caulk (make sure it is paintable) and caulk gun (to fill in any cracks in the corners of the trim)
2"x2"x4' long board for hanging the shelf and extra long screws (this part is in the tutorial)
decorative trim molding (12' long or two 8' lengths)
saw (I used a hand saw and miter box to cut the trim. It was a bit tricky to cut the angles and I messed up, but was able to fill the holes with caulk and they look great now.)
If you enlarge the pictures in the post I think they will help a lot on seeing exactly how it all fits together.
I hope I didn't leave anything out, if you have any questions I'd be happy to answer them. This way isn't the only way to get the look, but it's what worked for me.

One thing that I do want to share though is how I hung it, this thing is heavy! I got the idea from someone who posted about hanging a headboard this way, but unfortunately can't remember where I saw it.
How to hang a box mantel shelf:
1. Cut a board just smaller than the opening of the back of the box mantel shelf. Mine was a 2 x 2 1/2, I think (almost square). It was a leftover from a past project and turned out to be the perfect size.
2. Use a stud finder to locate the studs in the wall and mark them, then mark the placement on the mounting board.
3. Pre-drill the holes in the studs just smaller than the screws and in the mounting board as well.
4. Next you will pre-drill holes in the mounting board to attach the shelf to the top of it. Stagger them between the holes you've already drilled.
5. Use a level to make sure the board is level and then screw it into the wall.

6. Put the shelf next to the board, mark the placement of the drill holes, and pre-drill holes in the top back of your shelf.
7. Place the shelf over the board, lining up the holes, and screw it to the mounting board. I put in three screws. You'll need someone to hold it for you, trust me. :)
That's it, admire you're new 'mantel'!
So just for fun, here's a look at my unfinished Fall Mantel with the black shelf. So, so wimpy.

And how it looks now with my new mantel shelf. Now that's a shelf!
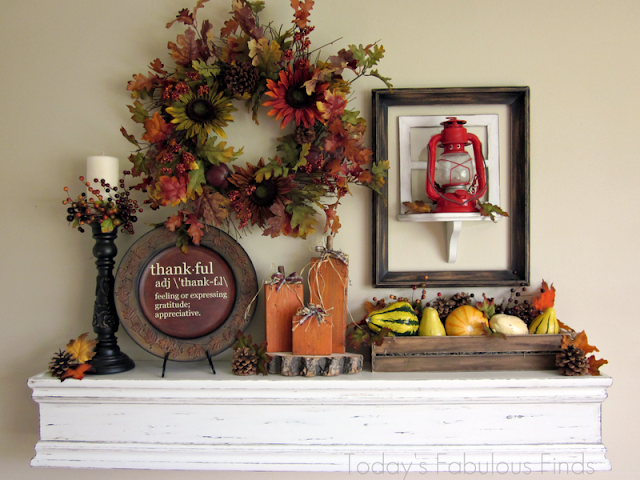
I've never had an actual real mantel shelf to decorate, so this was an especially fabulous find for me! My total cost was $10.40, which is simply amazing for such a big shelf!
I didn't make mine as "rustic" as hers. I already have a lot of distressed stuff in my house, and wanted it a little more simple. It still has some distressed parts, from stain and me beating it up, but it doesn't show that well from this pic. I also made mine a lot longer than hers so it was the same length as my tv stand.
Here is the link to her DIY mantle:
http://todaysfabulousfinds.blogspot.com/2011/11/diy-mantel-shelf-and-how-to-hang-it.html
Basic info from her blog:

Don't worry too much about unsightly gaps (the consequence of using an old miter box), some caulk will take care of it.
Edited to add: Sarah's tutorial is no longer available, so I'm adding some steps to the post.
After I stained it, I used a foam brush and primed it first. I usually don't prime first when I'm distressing, but the color was so dark that I was worried it would take too many coats of paint to cover it up. I've done it with and without primer, so really either way will work. Just keep adding coats of paint until the brown isn't showing through. I sanded the shelf with sandpaper to distress it when the paint was dry to the touch, but wasn't completely hardened yet. It seems to 'peel' off better and leave more of the stain underneath, when you distress it, if the paint still has a bit of a rubbery feel to it. You can fold your sandpaper in half and use the straight edge to get the straighter distressed lines. Next comes the glaze (optional). I put some dark glaze on a rag and wiped it over the corners and edges and into the inside corners to make them darker. You can also wipe on a light coat of glaze over the rest of the shelf. The last thing I did was to spray it with a clear acrylic spray in the matte finish. I think that it richens the colors and makes the shelf look finished.
Edited to add: I received an e-mail with questions on the construction and supplies, this is my reply. I apologize that this post is so disorganized! At this point I might need to rewrite it. :)
I used wood glue and screws to put the shelf together. It's been awhile since I made my mantel shelf, but I'm pretty sure that I pre-drilled the holes before I screwed the wood together. If you use a drill bit smaller than the size of the screw to drill a pilot hole first it prevents the wood from splitting.
The top and bottom of the shelf are cut from a 1x8x8 and are each 4' long. The front of the shelf is a 1x6x6 board and was cut down to 4' long. The rest of the 1x6x6 was used for the sides of the shelf. When I had the boards cut at Lowe's, I had them cut the 6" wide board down to 4' long for the front, then set the top of the shelf on it (lining up the corners) and then set the remainder of the board in place on the side to measure and mark it for the cut. (The shelf looks taller because the trim hangs down longer than the bottom of the shelf.)
Supplies you will need:
wood (1x8x8 and 1x6x6) I hope I'm remembering this right!
wood glue
screws (I just used some that I had on hand, if you ask at the home improvement store, they can direct you to some that will work.)
sandpaper (medium and heavy grit)
electric sander to sand the rough edges of the boards before and after you put it together (could sand by hand)
paint brush
stain
finish nails (to nail on the trim molding)
wood filler (to fill the holes from the nails and screws)
caulk (make sure it is paintable) and caulk gun (to fill in any cracks in the corners of the trim)
2"x2"x4' long board for hanging the shelf and extra long screws (this part is in the tutorial)
decorative trim molding (12' long or two 8' lengths)
saw (I used a hand saw and miter box to cut the trim. It was a bit tricky to cut the angles and I messed up, but was able to fill the holes with caulk and they look great now.)
If you enlarge the pictures in the post I think they will help a lot on seeing exactly how it all fits together.
I hope I didn't leave anything out, if you have any questions I'd be happy to answer them. This way isn't the only way to get the look, but it's what worked for me.

One thing that I do want to share though is how I hung it, this thing is heavy! I got the idea from someone who posted about hanging a headboard this way, but unfortunately can't remember where I saw it.
How to hang a box mantel shelf:
1. Cut a board just smaller than the opening of the back of the box mantel shelf. Mine was a 2 x 2 1/2, I think (almost square). It was a leftover from a past project and turned out to be the perfect size.
2. Use a stud finder to locate the studs in the wall and mark them, then mark the placement on the mounting board.
3. Pre-drill the holes in the studs just smaller than the screws and in the mounting board as well.
4. Next you will pre-drill holes in the mounting board to attach the shelf to the top of it. Stagger them between the holes you've already drilled.
5. Use a level to make sure the board is level and then screw it into the wall.

6. Put the shelf next to the board, mark the placement of the drill holes, and pre-drill holes in the top back of your shelf.
7. Place the shelf over the board, lining up the holes, and screw it to the mounting board. I put in three screws. You'll need someone to hold it for you, trust me. :)
That's it, admire you're new 'mantel'!
So just for fun, here's a look at my unfinished Fall Mantel with the black shelf. So, so wimpy.

And how it looks now with my new mantel shelf. Now that's a shelf!

Click here for tutorials on all of the items pictured above.
I've never had an actual real mantel shelf to decorate, so this was an especially fabulous find for me! My total cost was $10.40, which is simply amazing for such a big shelf!
Subscribe to:
Posts (Atom)